About Us

Axewelledge, a leading exporter from India, specializes in high-quality Bentonite. With a commitment to excellence, we supply premium Bentonite to the Middle East and Southeast Asia markets.


Contact Info

  • Address

    North Angle Complex, 304,
    150 Feet Ring Rd, Opposite Ambedkar Nagar BRTS Stop,
    Madhav Park, Punit Nagar,
    Mavdi, Rajkot, Gujarat 360004

  • Email

    info@axewelledge.com

© Axewelledge 2026, All Rights Reserved.
Seal a Leaking Farm Pond with Sodium Bentonite: 5 Steps | Axewelledge – Leading Bentonite Exporter from India | Quality Bentonite for USA & Europe
Seal a Leaking Farm Pond with Sodium Bentonite: 5 Steps
  • Jul 30, 2026

Seal a Leaking Farm Pond with Sodium Bentonite: 5 Steps

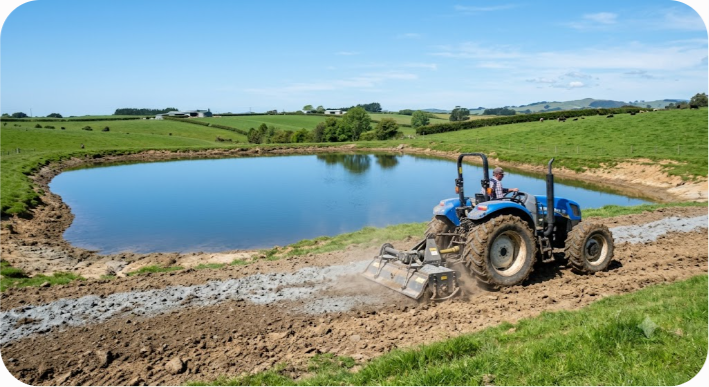
A farm pond can lose thousands of gallons of water every day through unsealed gravel, sandy soil pockets, or fractured bedrock, turning a crucial agricultural asset into an empty mud basin. While synthetic geomembrane liners are costly and prone to puncture, high-swelling sodium bentonite clay offers a permanent, self-healing, and natural seal by expanding 15 to 18 times its dry volume when hydrated.

To seal a leaking farm pond with sodium bentonite successfully, you must complete five critical steps: diagnose the leak rate and soil composition, calculate the exact quantity of bentonite required, prepare and clear the basin, apply the clay using the proper method, and thoroughly compact the mixture before refilling. Skimping on mechanical compaction or underestimating application rates causes over 80% of bentonite sealing failures.

This practical guide walks you through the core principles, soil physics, application methods, and common mistakes so you can restore your pond's water retention for decades.


Why Farm Ponds Leak (And How Sodium Bentonite Works)

Before spreading tons of clay across a dry or semi-dry basin, it helps to understand why ponds fail to hold water in the first place. Ponds leak when hydraulic head pressure forces water through soil pores that are too large or poorly compacted.

Soil consists of sand, silt, and clay particles. Sand and gravel have large void spaces that allow water to percolate freely. Clay particles are microscopic plates that fit tightly together, creating a low-permeability barrier. If your pond site contains less than 15% to 20% natural clay content, water will continuously seep downward into the local water table.

The Science of Sodium Bentonite's Swelling Capacity

Sodium bentonite is a naturally occurring mineral sediment rich in montmorillonite. Unlike calcium bentonite (which has low swelling characteristics and is primarily used for absorbent industrial products), sodium bentonite contains high levels of exchangeable sodium ions.

When sodium bentonite comes into contact with fresh water, water molecules get pulled into the spaces between the montmorillonite platelets. This process triggers a powerful physical expansion:

  • Volumetric Expansion: High-grade sodium bentonite expands 12 to 18 times its dry volume.
  • Gel Formation: As it swells, it forms a dense, flexible, low-permeability gel barrier.
  • Pore Clogging: This expanding gel fills every void, crack, and channel within the surrounding sand and gravel matrix.
  • Self-Healing Capability: If roots penetrate the layer or the ground shifts slightly, the hydrated clay continues to expand and re-seal the gap automatically.

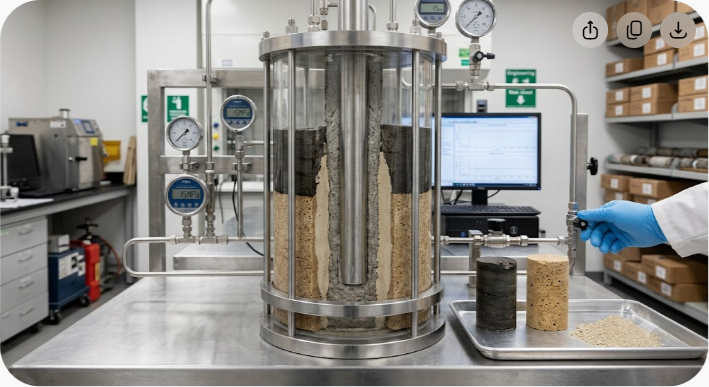
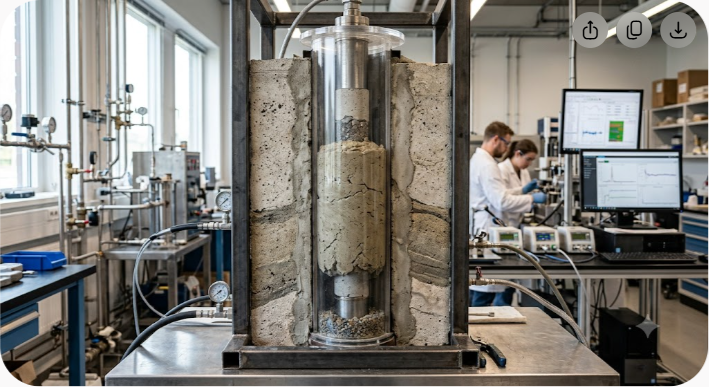
When properly mixed into the top few inches of pond soil and compacted, sodium bentonite reduces soil hydraulic conductivity (permeability) down to 1×10 ?7 cm/s or lower, meeting stringent environmental standards for industrial and municipal clay liners.


Granular vs. Powdered Bentonite: Which Should You Buy?

Choosing the right physical form of sodium bentonite directly impacts how easy it is to spread, how much dust is created, and how effectively it seals.

FeatureGranular Sodium BentonitePowdered (200-Mesh) Bentonite
Particle SizeCrushed granules (1 mm?3 mm, like coarse sand)Fine powder (similar to flour)
Dust HazardVery low; easy to handle in windHigh; requires respirators and calm weather
Application Best ForSoil mixing (Blanket & Mixed methods)Slurry drop through water columns
Hydration SpeedModerate, controlled expansionInstant swelling upon contact with water
Settling RateSinks quickly through standing waterFloats or drifts if dropped in open water

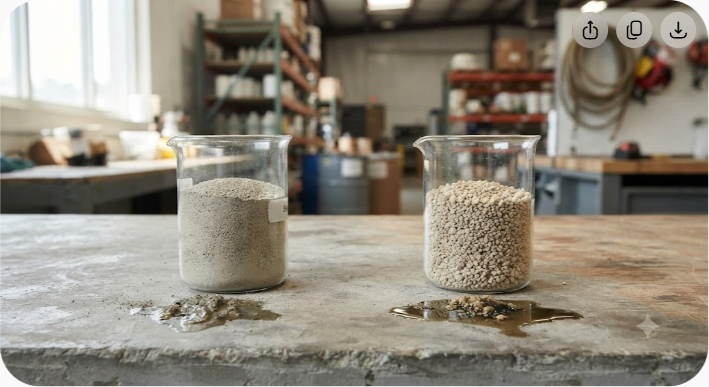
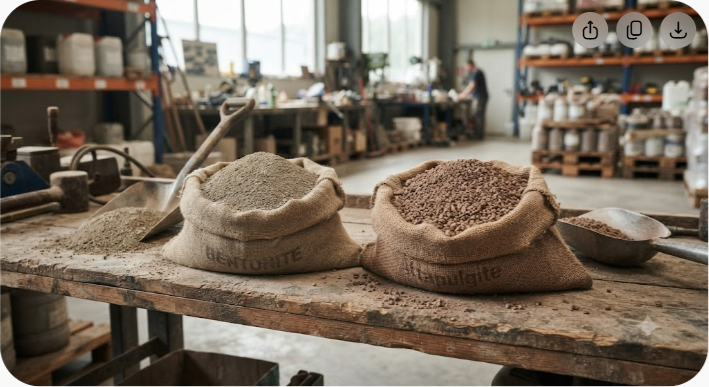
For nearly all farm pond sealing projects where the basin is drained or dry, granular sodium bentonite is the professional standard. It spreads evenly with standard agricultural equipment, produces minimal dust drift, and allows sufficient time for rototilling and compacting before absorbing moisture.


Step 1: Diagnose the Leak and Analyze Your Soil

Fixing a pond without analyzing the leak mechanism leads to wasted time and money. Your first step is determining whether the pond is leaking through the entire basin floor or at an isolated structural defect, such as a damaged spillway or pipe intake.

Determining the Evaporation vs. Leak Rate

All outdoor water bodies lose volume to natural evaporation. To confirm a structural leak, perform a simple bucket test:

  1. Fill a 5-gallon plastic bucket with pond water and place it on a shallow shelf inside the pond so the water temperature inside the bucket matches the pond.
  2. Mark the water level on the inside of the bucket and mark the pond's water level on the outside of the bucket with waterproof tape.
  3. Wait 48 to 72 hours without rain.
  4. Measure the drop in both levels. If the pond's water level dropped 2 inches while the bucket level only dropped 0.5 inches, your pond is losing 1.5 inches of water to ground seepage every three days.

Assessing Soil Type (The Jar Test)

To determine how much sodium bentonite you need per square foot, you must know your existing soil texture. You can perform a fast soil jar test right on your property:

  1. Take soil samples from 5 to 6 different spots across your dry pond floor, digging down 6 inches.
  2. Mix the samples together, fill a clear glass jar 1/3 full with the mixed soil, and fill the remaining 2/3 with clean water and 1 teaspoon of liquid dish detergent.
  3. Shake the jar vigorously for 3 minutes, then set it on a flat surface.
  4. Watch the layers settle: Sand settles in 1 minute; silt settles in 2 hours; clay remains suspended and takes 24 to 48 hours to fully settle.
  5. Measure the thickness of each layer to calculate percentages.
Soil TextureComposition BreakdownRecommended Bentonite Application Rate
Seal a Leaking Farm Pond with Sodium Bentonite: 5 Steps

| High Sand / Gravel | > 70% Sand and coarse particles | 3.0 to 5.0 lbs per sq ft (15?25 kg/m 2 ) | | Silt & Loam Mix | Balanced sand, silt, and minor clay | 2.0 to 3.0 lbs per sq ft (10?15 kg/m 2 ) | | Dense Clay Soil | High natural clay content | 1.0 to 2.0 lbs per sq ft (5?10 kg/m 2 ) |


Step 2: Calculate How Much Sodium Bentonite You Need

Applying too little bentonite is the single most common reason pond sealing projects fail. High-swelling sodium bentonite works only when the density of hydrated clay within the soil matrix reaches a threshold that chokes off water migration.

Standard Application Rates

Use the following industry application rates based on your soil jar test results:

  • Sandy Gravel or Porous Rock: 4.0 to 5.0 lbs per square foot (20 kg?25 kg/m

2 )

  • Sandy Loam / Coarse Sand: 3.0 to 4.0 lbs per square foot (15 kg?20 kg/m

2 )

  • Silt Loam / Fine Silt: 2.0 to 3.0 lbs per square foot (10 kg?15 kg/m

2 )

  • Clay Loam (Low Leakage): 1.0 to 2.0 lbs per square foot (5 kg?10 kg/m

2 )

Mathematical Calculation Example

Let's calculate the required tonnage for a half-acre farm pond with sandy loam soil.

1. Calculate Surface Area:

1 acre=43,560 sq ft

0.5 acres=21,780 sq ft

  1. Account for Slope Surface Area:

Pond side slopes add surface area beyond two-dimensional map views. Multiply the flat area by an adjustment factor of 1.15 to account for 3:1 bank slopes:

21,780 sq ft×1.15=25,047 sq ft

  1. Multiply by Application Rate:

For sandy loam, use 3.5 lbs per square foot:

25,047 sq ft×3.5 lbs/sq ft=87,664.5 lbs

4. Convert to Tons:

87,664.5 lbs÷2,000 lbs/ton=43.83 US Tons

Always order a 5% to 10% buffer to account for uneven application, deeper pockets, or localized high-porosity spots.


Step 3: Prepare the Pond Basin Properly

Spreading sodium bentonite directly over overgrown brush, weeds, or standing mud guarantees failure. The clay must bind directly with clean mineral soil particles to form an impermeable membrane.

Draining and Drying the Site

  1. Pump Out Standing Water: Drain the pond entirely using a trash pump or bottom drain.
  2. Allow Soil to Dry: Let the basin dry until heavy machinery (a tractor, skid steer, or roller) can operate without sinking into deep ruts. The soil should be damp like a wrung-out sponge, but not slushy. Moisture content between 12% and 18% provides ideal conditions for soil compaction.

Clearing and Grading

  • Remove Organic Debris: Scrape away all aquatic vegetation, weeds, topsoil, roots, sticks, and organic muck. Organic matter decays over time, leaving behind air pockets and channels that cause future leaks.
  • Remove Large Rocks: Pull out sharp rocks, boulders, or debris larger than 2 inches in diameter. These create localized pressure points that prevent uniform compaction.
  • Smooth the Slopes: Grade steep side slopes down to a ratio of 3:1 (three horizontal feet for every one vertical foot) or flatter. Equipment cannot safely compact bentonite on steep banks, and uncompacted clay will eventually slide down into the deep end.

Step 4: Apply the Sodium Bentonite (3 Proven Methods)

There are three distinct application techniques depending on whether your pond is completely drained, partially filled, or impossible to drain.
Seal a Leaking Farm Pond with Sodium Bentonite: 5 Steps
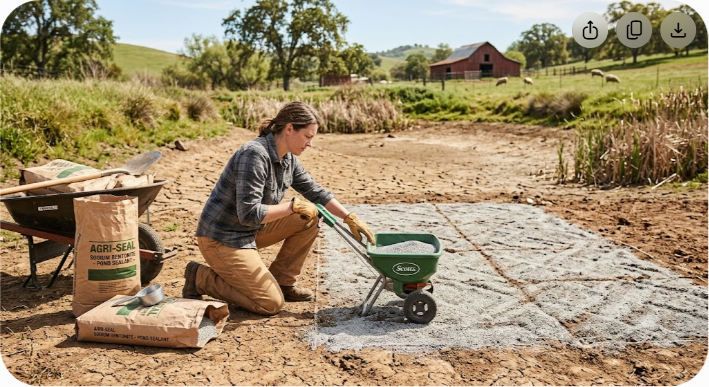
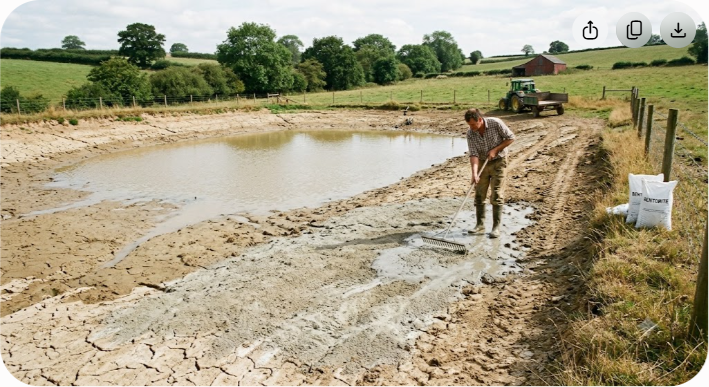
  1. The Mixed Method: The most reliable approach for drained ponds. Granular clay is spread over the floor and rototilled into the top 4 to 6 inches of soil before mechanical compaction.
  2. The Blanket Method: Best for extreme leaks or gravel beds. A continuous layer of pure bentonite is spread over the subgrade and covered with a 6-inch protective layer of clean native soil.
  3. The Sprinkle or Slurry Method: Used as an emergency fix for full ponds that cannot be drained. Granular bentonite or heavy slurry is dropped through standing water above known leak zones.

Method 1: The Mixed Method (Best Overall & Highly Recommended)

This method integrates sodium bentonite into the existing soil layer, protecting the clay from erosion, wave action, and livestock damage while creating a thick, durable hydraulic barrier.

  1. Grid Out the Pond Floor: Use wooden stakes and string to mark out 100 sq ft grids (10 ft×10 ft).
  2. Distribute Bags Evenly: Place the exact amount of bentonite required per grid section (e.g., six 50-lb bags for a 3 lb/sq ft rate) inside each square.
  3. Spread the Clay: Use a lawn roller, rake, drop spreader, or tractor-mounted fertilizer spreader to distribute the granules evenly across the grid.
  4. Rototill into Soil: Use a heavy-duty tractor tiller or rear-tine rototiller to thoroughly blend the bentonite into the top 4 to 6 inches of soil. Pass over the entire area twice in crosswise directions (north-south, then east-west).

Method 2: The Blanket Method (Ideal for Extreme Leaks or Sandy Soils)

The blanket method creates a continuous, pure layer of sodium bentonite beneath a protective blanket of native soil. This is the preferred method when dealing with pure gravel or highly porous bedrock.

  1. Excavate the top 6 inches of soil from the entire pond basin and stockpile it along the perimeter.
  2. Smooth and compact the exposed subgrade floor.
  3. Spread high-grade granular sodium bentonite evenly over the entire surface at a rate of 3.0 to 5.0 lbs per square foot, creating a uniform, unbroken layer of pure clay.
  4. Carefully push the stockpiled native soil back over the bentonite layer using a smooth-bucket excavator or light dozer, maintaining a protective cover depth of 6 inches. Take care not to drag equipment tracks directly across the exposed bentonite.

Method 3: The Sprinkle / Slurry Method (For Full Ponds Without Draining)

If draining your pond is physically impossible due to live fish stock or spring inflows, you can apply bentonite through standing water. Note: This method has a lower success rate (around 40% to 50%) because water currents disperse the clay unevenly, and mechanical compaction cannot be performed.

  1. Mix granular or coarse-mesh powdered sodium bentonite with water to create a heavy slurry, or sprinkle granular clay directly over the surface above known leak zones.
  2. The heavy granules sink through the water column, pulled by gravity toward active seepage channels where water exits the basin.
  3. As the clay drops into deep soil fissures, it swells and seals flow paths.
  4. Apply 3 to 5 lbs per square foot over suspected leak areas and repeat as needed.

Step 5: Compact the Soil and Refill the Pond

Applying bentonite without thorough mechanical compaction is the primary reason projects fail. Spreading clay on loose soil leaves millions of microscopic air pockets. When water fills the pond, hydraulic pressure pushes through these loose voids before the clay can fully hydrate and swell.

Proper Compaction Equipment

  • Best Equipment: A sheepsfoot roller (tamping foot roller) provides high contact pressure that kneads the clay and soil matrix together, removing air voids from the bottom up.
  • Alternative Equipment: A heavy smooth-drum vibratory roller, a fully loaded tractor with heavy rubber tires, or a skid steer. Make repeated overlapping passes across the entire basin floor and side slopes.
  • Small Areas: Hand-operated plate compactors work well along shallow edges, around pipe penetrations, and near spillways.

Compact the soil in thin lifts (no thicker than 2 inches per pass). Make at least 4 to 6 full passes over every square foot of the pond basin until the machinery no longer leaves visible impressions in the dirt.

Controlled Refilling Guidelines

Once compaction is complete, how you fill the pond dictates your long-term success:

  1. Protect the Inflow Spot: Never pump high-velocity water directly onto bare, compacted bentonite soil. The force of incoming water will wash away your clay barrier. Place a splash pad, heavy rubber mat, large rocks, or a baffle plate directly beneath your fill pipe.
  2. Fill Slowly: Water should enter at a slow, steady rate. This allows the sodium bentonite to absorb moisture gradually, expand into the soil voids, and form a tight gel seal without scouring.
  3. Keep Off the Wet Edges: Keep heavy equipment, vehicles, and livestock completely away from the pond basin once filling begins. Soft, swelling clay soil is easily rutted, which breaks the continuous seal layer.

5 Critical Mistakes That Cause Bentonite Sealing Failures

Avoid these five common pitfalls to ensure your pond stays sealed for years to come:

1. Using Calcium Bentonite Instead of Sodium Bentonite

Calcium bentonite is a low-swelling clay used in foundry sand and absorbent products. It expands only 2 to 3 times its volume, compared to sodium bentonite's 12 to 18 times expansion. Always confirm you are purchasing 100% natural, high-swelling Sodium Bentonite with high montmorillonite content.

2. Underestimating Required Tonnage

Applying 1 lb per square foot on coarse sand or gravel almost always fails. If the clay density is too sparse, expanding gel cannot form a continuous barrier, allowing water to slice through loose spots.

3. Skimping on Soil Preparation and Debris Removal

Roots, leaves, aquatic weeds, and sticks decay within 6 to 12 months under water. When they rot away, they leave open tunnels straight through your bentonite-soil liner. Strip all organic material down to clean mineral subsoil before applying clay.

4. Poor or Missing Mechanical Compaction

Rototilling clay into dry soil without heavy rolling creates a loose, porous sponge rather than a dense, impermeable liner. You must compact the soil with heavy machinery to achieve low permeability.

5. Water Quality and High Salinity Issues

Sodium bentonite relies on sodium ion exchanges to swell. If your fill water contains high concentrations of dissolved salts, hard minerals, or calcium ions, these cations replace the sodium on the clay platelets. This exchange reduces the clay's swelling capacity by up to 70%. If your water is extremely hard or brackish, test a small sample of clay in your pond water before buying bulk quantities.


Maintenance: Keeping Your Bentonite Seal Intact

A properly installed sodium bentonite liner lasts indefinitely because natural clay does not degrade, rot, or crack like synthetic plastic liners. However, physical disruption can breach the seal:

  • Livestock Access: Keep cows, horses, and heavy livestock out of the pond. Hooves sink into damp bottom clay, punching holes straight through the sealed layer. Fence off the main pond body and pump water to a trough, or build a single gravel-stabilized ramp access point.
  • Deep-Rooted Trees: Do not allow trees like willows, poplars, or cottonwoods to grow along the embankment or inside edges. Their aggressive roots penetrate the clay liner. When the trees die, decaying roots leave leaking channels.
  • Burrowing Wildlife: Muskrats, nutria, and crawfish burrow into bank walls and break bentonite seals. Control rodent populations promptly and maintain minimum 3:1 bank slopes to deter burrowing.
  • Severe Drawdown: If your pond dries out completely during a severe summer drought, small shrinkage cracks may form in the bentonite liner. However, because sodium bentonite retains its swelling properties indefinitely, it will re-expand and self-heal naturally as soon as rains return.

Partnering with Premium Industrial Bentonite Producers

When sealing large-scale farm ponds, agricultural reservoirs, or industrial water containment sites, product purity and consistent swelling capacity determine long-term success. Inferior clay blends containing high silt or sand ratios yield unpredictable expansion rates.

As a global producer and exporter of natural minerals, Axewelledge supplies premium sodium bentonite sourced from high-grade mining reserves. Processed under strict international quality standards, Axewelledge's sodium bentonite offers exceptional swelling capacity, high water absorption, and reliable performance for agricultural, civil engineering, and environmental sealing applications worldwide.

Whether you need reliable bulk shipments for large agricultural irrigation projects or specialized high-yield sealing clays, working directly with an established producer ensures consistent material performance from the first bag to the last ton.
Summary Checklist: Your Pond Sealing Roadmap

  1. Run a 3-day bucket test to calculate true water loss versus evaporation.
  2. Perform a jar test to determine soil sand, silt, and clay ratios.
  3. Calculate total square footage (including side slopes) and order natural granular sodium bentonite with a 10% safety margin.
  4. Drain, dry, and scrape all vegetation, roots, and rocks out of the basin down to mineral soil.
  5. Apply clay evenly using the Mixed Method (2 to 5 lbs/sq ft based on soil type).
  6. Rototill 4 to 6 inches deep in two directions to blend clay thoroughly with native soil.
  7. Compact thoroughly with a heavy sheepsfoot or vibratory roller in multiple passes.
  8. Refill slowly over an inflow splash pad to protect your new continuous clay seal.
×

We'd Love to Hear from You